
Your Complete Artificial Turf Installation Guide for Prescott Homeowners
- Jan 30
- 13 min read
Tired of the constant watering, mowing, and expense of keeping a natural lawn alive in the Prescott climate? Artificial turf is a fantastic solution for a beautiful, low-maintenance yard, but the secret to its long-term success is a perfect installation. If you're a homeowner in Prescott, Prescott Valley, or anywhere in Yavapai County considering this upgrade, this guide is for you.
At R.E. and Sons Landscaping, we solve the high-maintenance yard problem for our neighbors right here in Northern Arizona. As a licensed and bonded local company, we've helped over 2,500 clients create stunning, durable outdoor spaces that are built to handle our unique weather—from intense sun to heavy monsoon rains.
This guide gives you an expert look at how a professional-grade artificial turf installation is done. Whether you're a dedicated DIYer or looking to hire a trusted local team like ours, you'll learn what it takes to get the job done right, ensuring your new lawn is an investment that pays off for years to come.
What is a professional artificial turf installation?
A professional artificial turf installation is a multi-step construction project, not just rolling out a green carpet. It involves precise excavation, building a compacted and properly graded base, expertly seaming the turf rolls, and securing the final product with the correct type and amount of infill. This process is essential for creating a durable, long-lasting lawn that drains properly and looks natural.
Here in Prescott, a professional installation means building a foundation that can handle our rocky soil and sudden downpours. It requires expertise and the right equipment to prevent common issues like sinking, visible seams, and poor drainage.
Why does a professional-grade installation matter?
A professional-grade installation matters because it protects your investment and guarantees a lawn that will last for over a decade. The global artificial turf market is booming—projected to grow from USD 6.87 billion to USD 9.97 billion by 2030—and that growth is driven by homeowners in places like Northern Arizona who demand quality. Skimping on the installation process is the #1 cause of turf failure.
Here are the factors that define a successful project:
Proper Groundwork: The base must be perfectly graded and compacted to prevent sinking, create a smooth surface, and ensure water drains away correctly. This is the most critical step.
Quality Materials: Every component, from the turf itself to the seam tape and infill, contributes to the final result. Learn more in our guide on how to choose the right turf to enhance your outdoor space.
Expert Technique: Creating invisible seams and securing the edges are skills that clearly separate an amateur job from a professional one.
We believe a great landscape always starts with a solid foundation. Here in Prescott, that means building a base that can handle intense sun, sudden downpours, and everything in between. Skimping on the prep work is the single biggest mistake we see.
Ultimately, whether you decide to do it yourself or hire a trusted local team like R.E. and Sons Landscaping, understanding these steps is crucial. This artificial turf installation guide will arm you with the knowledge to make sure your new lawn provides beauty and enjoyment for years.
DIY vs. Professional Installation: Which is right for me?
Deciding whether to tackle this project yourself or bring in the pros is a big first step. Here’s a quick breakdown to help you weigh the options for your Prescott-area home.
Factor | DIY Installation | Professional Installation (R.E. and Sons) |
|---|---|---|
Upfront Cost | Lower material and tool rental costs. | Higher initial investment covering labor, expertise, and warranty. |
Time & Effort | Significant time commitment (40-60+ hours); physically demanding work. | Fast and efficient (1-3 days on average); we handle all the heavy lifting. |
Equipment | Requires renting or buying heavy equipment like plate compactors and turf cutters. | We arrive with all necessary professional-grade tools and machinery. |
Expertise | Relies on online tutorials; high risk of common mistakes (bad seams, poor drainage). | Decades of local experience; we guarantee a flawless finish that avoids costly errors. |
Final Result | Can look good, but often shows minor imperfections like visible seams or uneven spots. | A seamless, professional appearance built to last and withstand the Arizona climate. |
Warranty | No warranty on your labor; material warranties may be voided by improper installation. | We stand behind our work with a comprehensive installation warranty. |
While a DIY approach can save money upfront, hiring a professional team like ours ensures the job is done right the first time, protecting your investment and giving you a perfect lawn without the headache.
How do you prepare the ground for artificial turf?
The secret to a perfect, long-lasting artificial lawn isn't the turf itself—it’s the meticulously prepared foundation hiding underneath. From our experience across Prescott Valley, we can tell you that improper ground prep is the number one reason for lumps, drainage problems, and a drastically shortened lifespan.
This initial phase is where the real work happens. Let's walk through this crucial process, tailored specifically for the challenges of Northern Arizona's unique, often rocky soil.
Why are excavation and grading so important?
Excavation and grading are non-negotiable because they create the stable, properly draining foundation your turf needs to last. You can't just lay turf over existing dirt. For a lasting installation, we excavate 3 to 4 inches deep to remove all grass, roots, and large rocks. Anything left behind will decompose and create soft spots or lumps under your new lawn.
Proper drainage is another huge factor, especially with our heavy monsoon season here in Yavapai County. A completely flat surface is a recipe for standing water. We solve this by creating a subtle 1% to 2% grade, carefully sloping the area away from your home's foundation. This ensures water drains through the base and away from your property.
To help you decide on the best path forward for your project, this visual guide breaks down the choice between doing it yourself and hiring a professional.
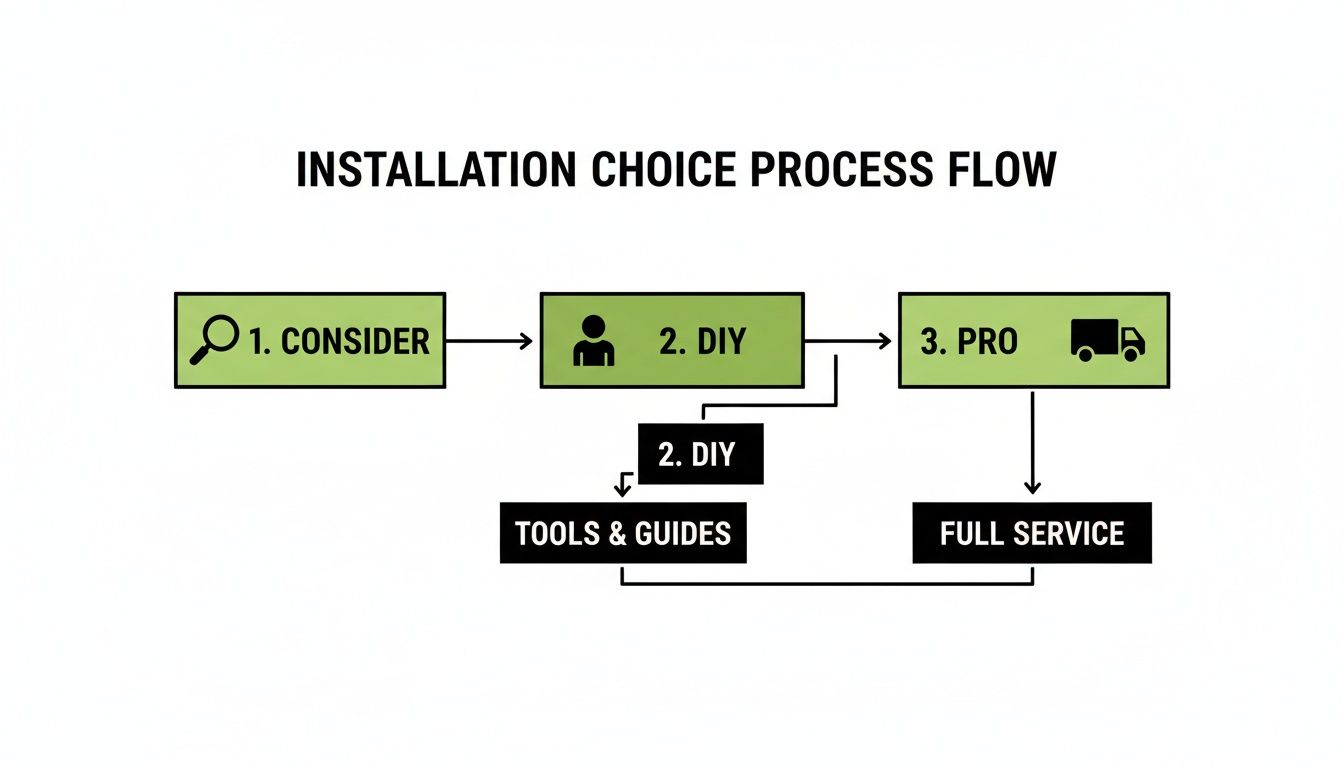
This flowchart illustrates that whether you choose DIY or a professional service, these foundational steps are essential for a successful outcome.
What is the best base material for Arizona soil?
The best base material for our local soil is decomposed granite (DG) or a similar crushed rock aggregate. Once the area is excavated and graded, this sub-base layer provides the firm, yet permeable, platform your turf will rest on.
Here in Northern Arizona, we’ve found that certain materials perform much better than others.
Decomposed Granite (DG): This is our go-to material. DG is a fine, crushed rock that compacts into an incredibly solid surface but still allows water to pass through effectively.
Crushed Rock Aggregate: A layer of slightly larger crushed rock can be used as the initial layer to aid in drainage before being topped with decomposed granite for a smooth finish.
The goal is to build a base that feels as solid as concrete but drains like a sieve. This combination of strength and permeability is what protects your investment from both sinking and water damage over time.
For more detailed information on ground preparation, you might be interested in our guide on how to prepare your yard for artificial turf installation in Prescott.
How do you compact the base correctly?
You compact the base by spreading the material in 2-inch layers (or "lifts"), lightly moistening each layer, and then using a heavy-duty plate compactor to create a solid, smooth surface. Simply spreading the base material isn’t enough; proper compaction is essential to prevent future settling. We repeat this process until the base is at the desired height, typically just below surrounding walkways or patios.
Proper compaction does three critical things:
Creates a stable foundation that prevents dips and depressions from forming under heavy foot traffic.
Ensures a perfectly smooth surface, which is essential for a natural-looking lawn.
Acts as a weed barrier, making it extremely difficult for anything to grow up through the dense base and turf backing.
This is the most important part of any artificial turf installation guide. It’s the difference between a lawn that looks great for a year and one that R.E. and Sons Landscaping builds to last for a decade or more.
How to lay and seam artificial turf
Once you’ve got a solid, compacted base, it's time to roll out the green. This is where precision separates a decent DIY job from a truly professional one.
Before laying any turf, we put down a layer of geotextile fabric. This is a non-negotiable step that completely blocks weeds from growing through. This practice is standard in mature markets like Europe, which holds 38.69% of the global market share, because it works. For a deeper dive into these global standards, you can explore the full market analysis from rootsanalysis.com.
How do you position turf rolls correctly?
First, unroll the turf and let it sit in the sun for an hour or two to relax and flatten out. When you're ready to position it, make sure the direction of the grass blades, or the pile direction, is the same for every piece. For the most natural look, all blades should point toward the main viewing area, like your back porch or kitchen window.
Pro Tip: Before you make a single cut, walk around and look at the turf from different angles. The color can look slightly different depending on whether you're looking into the grain or with it. Make sure you love how it looks from your main vantage point.
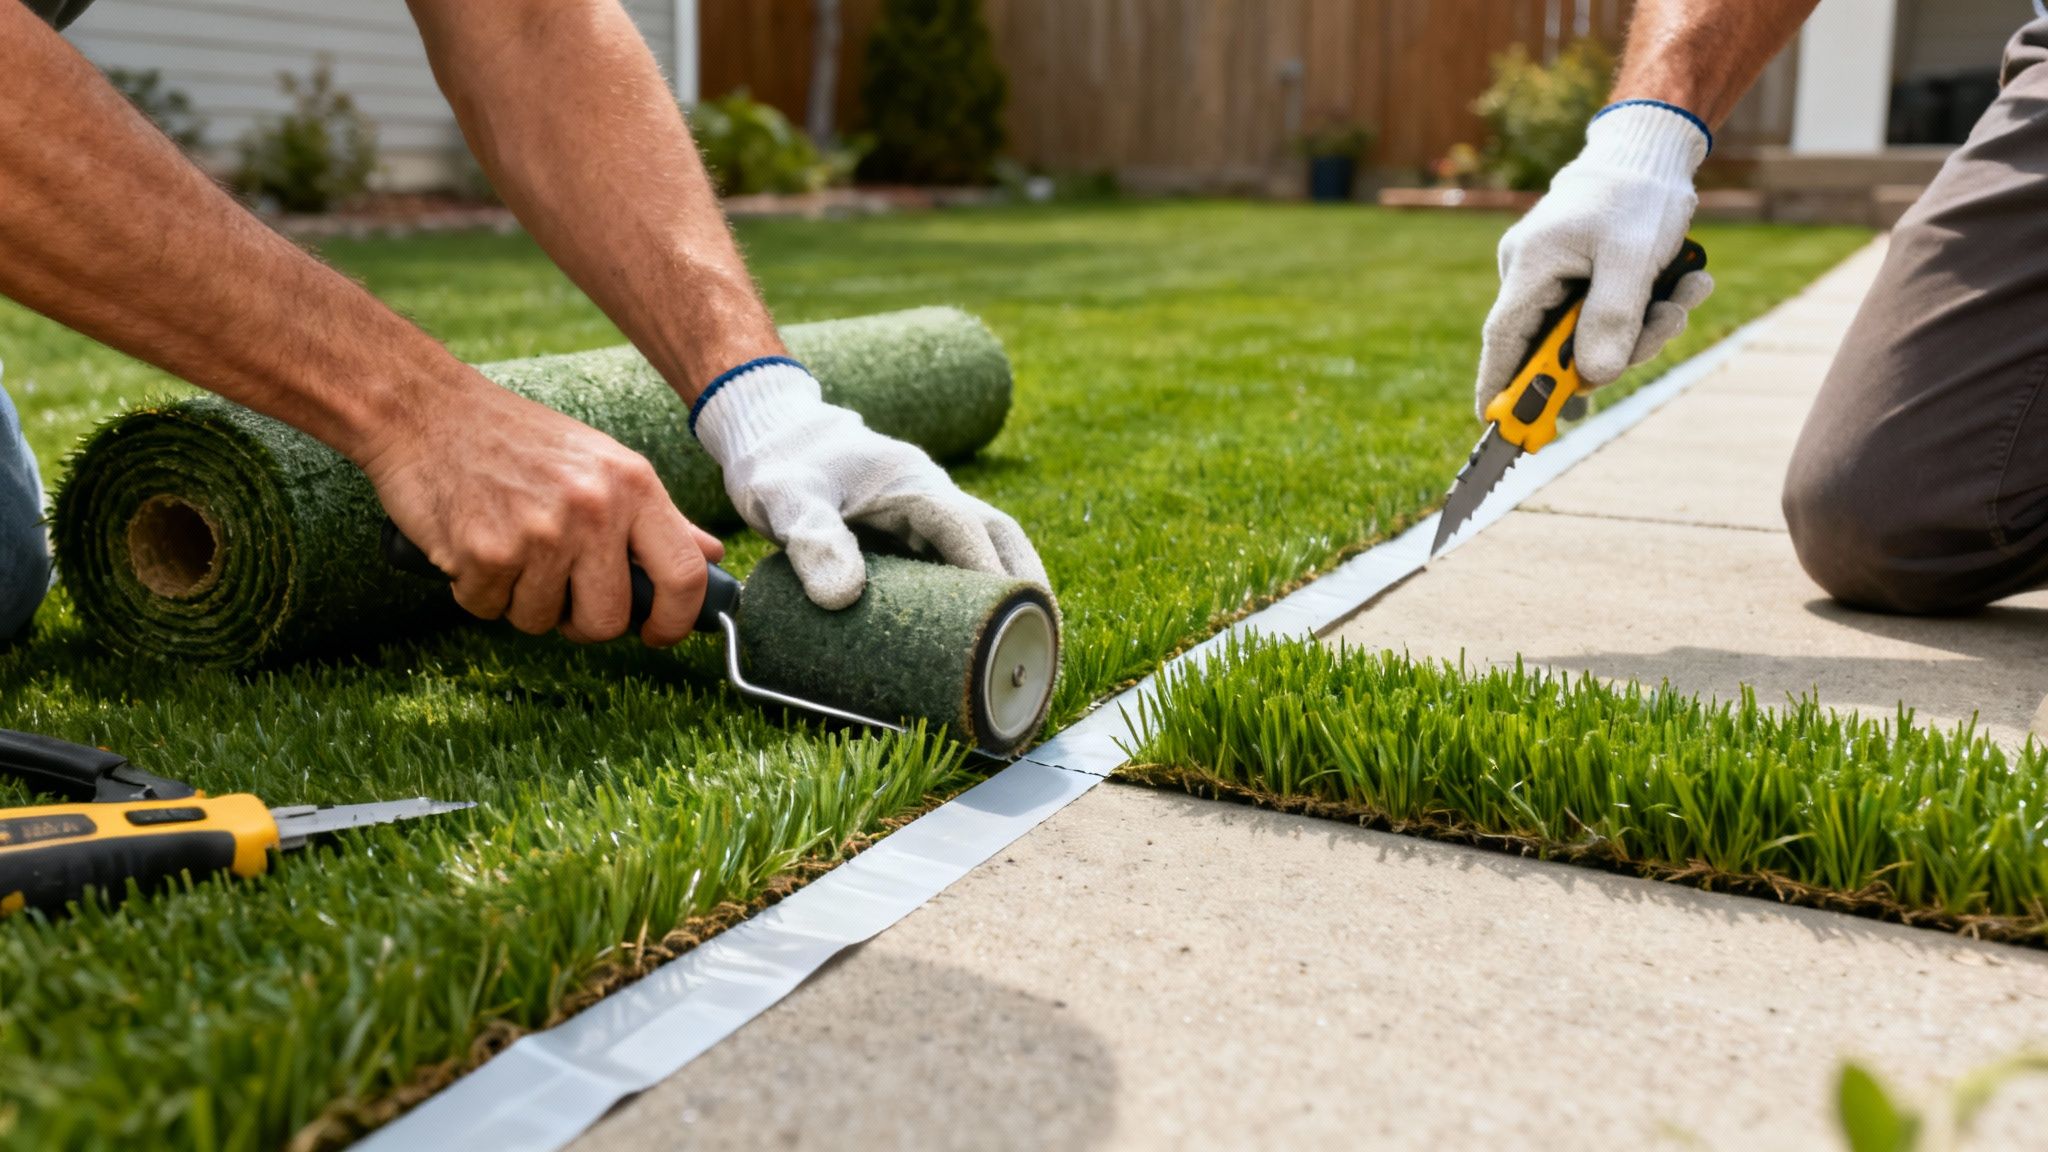
How do you make clean cuts around edges?
To get those crisp, clean lines against walkways and planters, you need a sharp utility knife or a specialty turf cutter.
Here’s our process for perfect edges:
Rough Cut First: Lay the turf so it overlaps the hard edge by a few inches to give yourself a safety net.
Tuck and Trim: Use a stiff putty knife to tuck the turf edge tightly against the hardscape. This creates a perfect crease to guide your final cut.
The Final Cut: Run your utility knife right along that crease. Change your blades often—a dull blade will tear the turf backing.
What is the secret to invisible seams?
The secret to invisible seams is trimming the factory edges, leaving the correct gap, and using proper seam tape and adhesive. This is where most DIY projects go wrong.
First, you must trim off about three rows of tufts from the factory edge of each piece you plan to join. This allows the grass fibers to mesh together naturally. Next, line up the two pieces with a tight, consistent gap of no more than 1/8th of an inch.
Seam Tape and Adhesive: Center a 12-inch wide roll of seam tape under the joint, sticky side up. Apply a specialty turf adhesive in a winding "S" pattern.
Press and Secure: Carefully press both sides of the turf backing onto the adhesive and walk along the seam to create a strong bond.
Ruffle the Fibers: After the glue sets, use your fingers or a stiff brush to fluff up the grass blades along the seam, making the line vanish completely.
Finally, secure the perimeter. Here in Prescott, the wind can be relentless. We drive 6-inch galvanized spikes every 6 to 8 inches around the entire lawn and along each seam to ensure your lawn stays put, no matter what our Northern Arizona weather throws at it.
How do you add infill to artificial turf?
The final steps of adding infill and grooming the turf are what transform it into a lawn that looks and feels realistic. Infill is the functional heart of your lawn, adding weight, resilience, and support to the grass blades.
Infill is especially critical here in Northern Arizona because it:
Protects from UV Rays: Infill shields the turf’s backing from our intense Prescott sun, preventing it from becoming brittle.
Provides a Cushioned Feel: It creates a softer, more natural surface underfoot.
Supports Grass Blades: It works its way down to the base, propping up the fibers so they resist matting down from foot traffic.
Without the right amount and type of infill, your turf will look flat and fake, and its lifespan will be cut short.
What type of infill should I use?
The right infill depends on how you plan to use your lawn. For most residential projects we handle in the Prescott area, a few options stand out.
Common Infill Options
Silica Sand: A cost-effective workhorse that provides excellent weight and stability. It's a solid choice for general landscape use.
Envirofill™ or Coated Sand: A premium option we often suggest for yards with kids and pets. The anti-microbial coating helps reduce bacteria and keeps the turf cooler—a huge plus in our sunny climate.
Pet-Specific Infill: A smart investment for dog owners. These products are non-absorbent and help neutralize ammonia from pet urine, which makes a massive difference in controlling odors.
At R.E. and Sons Landscaping, we almost always recommend a coated or pet-specific infill for our clients in Prescott Valley and Chino Valley. The long-term benefits of odor control and cooler surface temperatures really improve the comfort and satisfaction you get from your lawn.
How much infill do I need and how do I spread it?
You should apply between 1.5 to 2.5 pounds of infill per square foot, depending on your turf's pile height. For a 500-square-foot lawn, that’s 750 to 1,250 pounds of material.
The best way to apply it is with a broadcast or drop spreader for an even, consistent layer. Your goal is to get it distributed evenly so it settles deep into the base of the turf, not just sit on top.
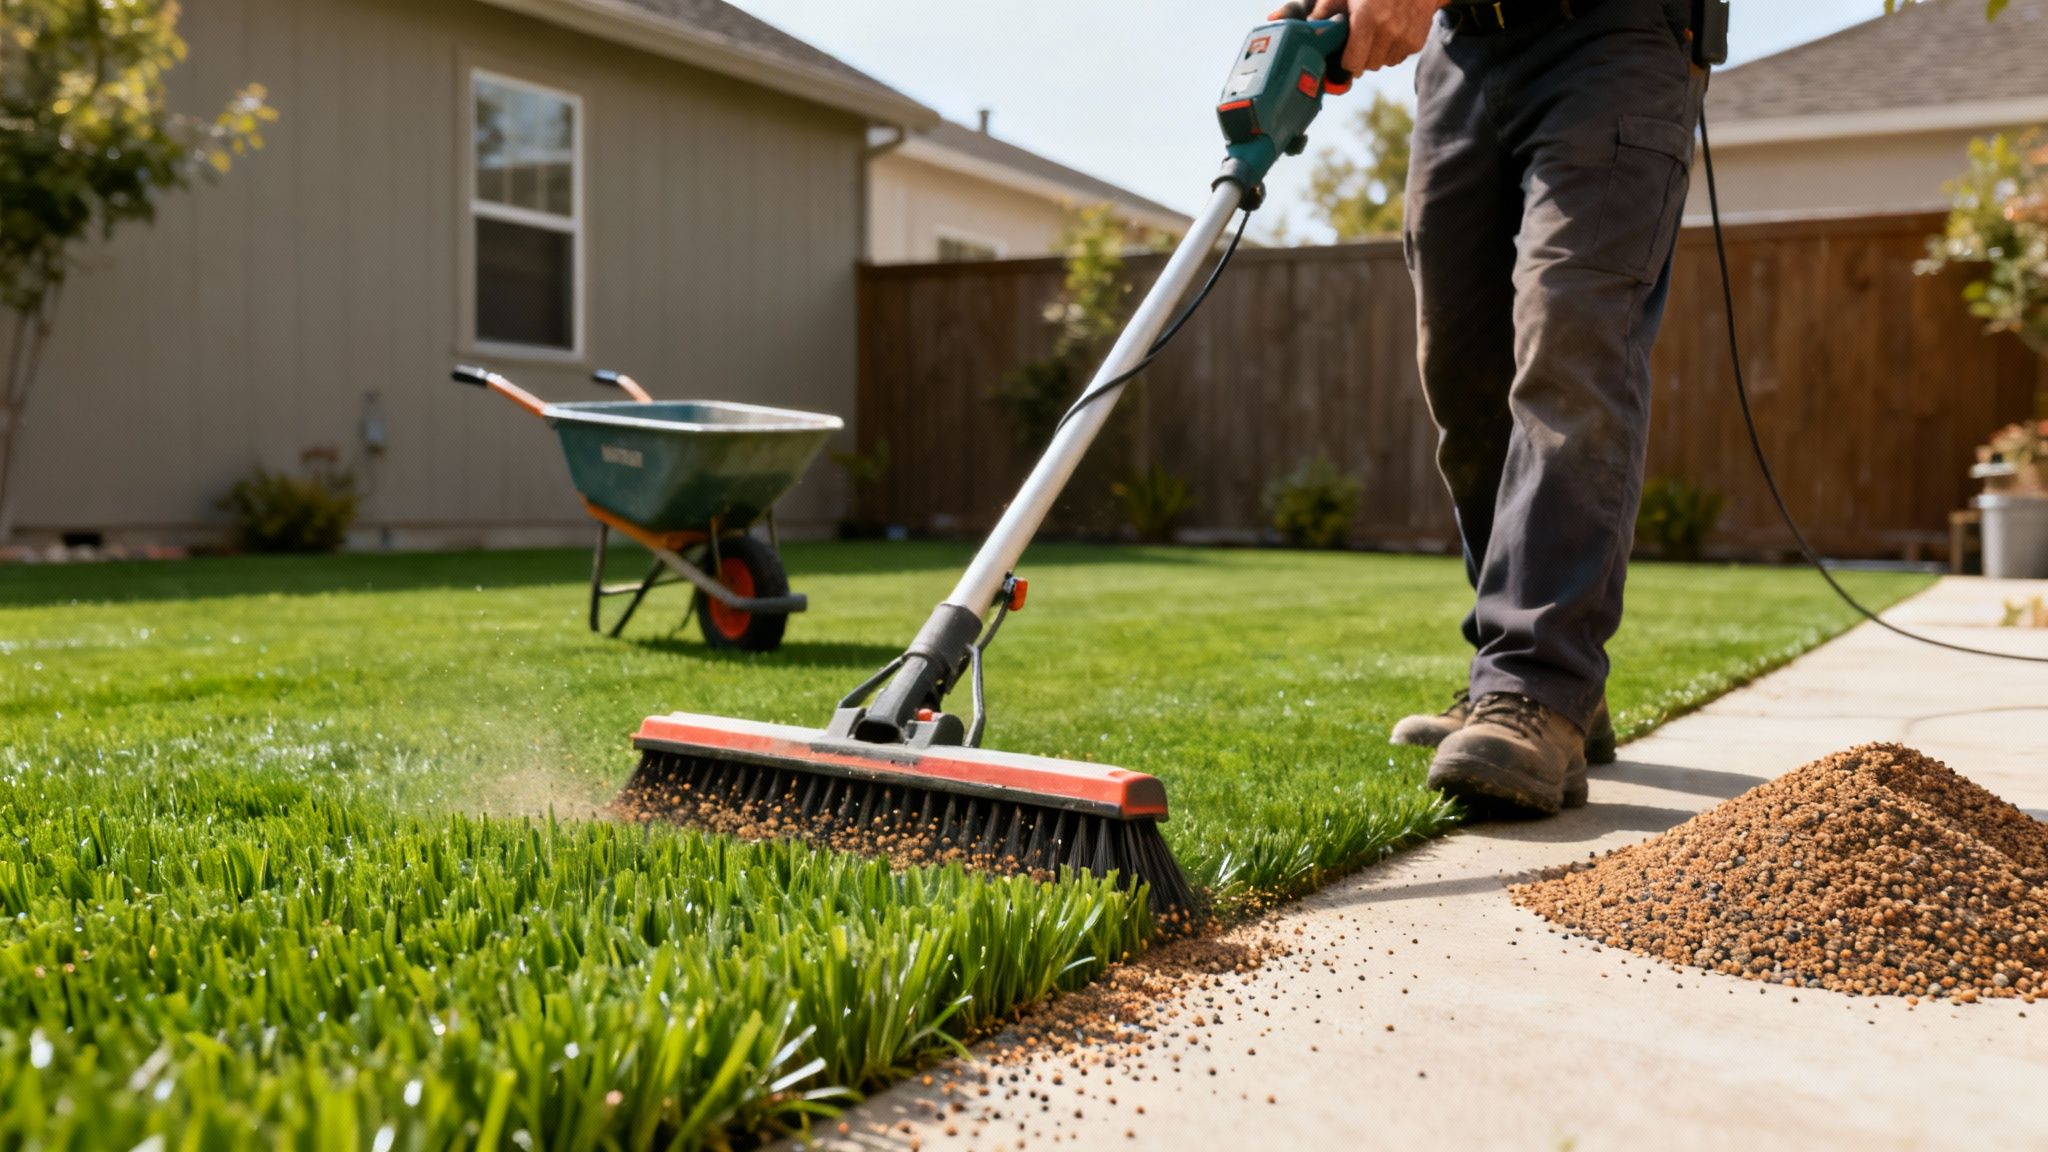
What is "blooming" the turf?
"Blooming" the turf is the final grooming process where you use a power broom to work the infill down into the fibers while simultaneously lifting the grass blades up. This crucial step gives a new lawn its lush, full, and incredibly natural appearance.
A power broom is a motorized sweeper with tough bristles that vigorously brushes the turf. We always make multiple passes, going in different directions to make sure every blade is standing tall and the infill is perfectly settled. This sets the foundation for your turf's long-term performance.
What are the most common installation mistakes in Arizona?
After installing over 2,500 artificial turf lawns in Northern Arizona, our team at R.E. and Sons Landscaping has seen it all. We are often called to fix projects that started with good intentions but ended badly. Understanding these common pitfalls we've seen right here in Prescott and Chino Valley is the best way to avoid them.
An inadequate or uneven base
The single most common and destructive mistake is a poorly prepared base. Homeowners or inexperienced installers often don't dig deep enough or fail to compact the base material correctly. This results in sinking spots, areas where water pools during monsoons, and a lumpy surface that only gets worse over time.
We once repaired a lawn in Prescott Valley where the installer had only scraped off the top layer of grass before adding a thin layer of sand. Within a year, the entire yard was a series of hills and valleys. A solid, compacted base of at least 3-4 inches is non-negotiable for longevity.
Obvious and ugly seams
Nothing screams "fake grass" louder than a visible seam. Getting seams to disappear requires precision and is where many DIY projects fail. The mistake usually happens by forgetting to trim the factory edges, leaving too wide a gap, or overlapping the pieces, which creates an unnatural ridge.
Using the wrong infill for our climate
Infill is a critical component, not just filler. Using the wrong type is a huge misstep in our high-sun, dry Northern Arizona climate. Plain silica sand, while cheap, can get scorching hot in the summer. For pet owners, it's an even bigger problem, as it can absorb pet urine and lead to stubborn odors. At R.E. and Sons Landscaping, we almost exclusively use coated, anti-microbial sand or specialized pet-friendly infills that stay cooler and prevent odors.
Knowing When to Hire a Professional Installer
While the DIY spirit is strong here in Prescott, some projects are better left to the pros. Knowing when to call a licensed and insured team like R.E. and Sons Landscaping can save you time, money, and frustration. A DIY installation is possible for a small, simple area, but for a seamless, natural finish—especially on complex jobs—our experience is invaluable.
When does a professional make all the difference?
You should seriously consider hiring a professional crew if your project involves:
Steep Slopes or Complex Grading: Managing drainage and building a stable base on a sloped yard requires specialized equipment and an understanding of our local soils.
Large or Oddly Shaped Yards: Seamlessly joining multiple large rolls and making precise cuts around curves and intricate hardscaping is an art form that takes years of practice.
Custom Features: If you're dreaming of a backyard putting green or want to integrate turf perfectly with a new paver patio, professional design and execution are key.
At R.E. and Sons Landscaping, we handle these complex scenarios daily. We bring commercial-grade equipment and give you the peace of mind that comes with a comprehensive warranty, all backed by our Arizona ROC #300642.
The R.E. and Sons Landscaping Process
Working with us is designed to be a straightforward and stress-free partnership. We’ve honed our process to make sure every client in Prescott, Prescott Valley, and the surrounding communities knows exactly what to expect. It’s a simple, 4-step journey to your perfect outdoor space.
A professional installation is more than just labor—it's a guarantee of quality and longevity. We ensure every detail, from the base preparation to the final seam, is handled with precision for a superior result that lasts.
Our approach is all about clarity and your peace of mind:
Consult: It starts with a conversation. We listen to your vision and assess your property.
Design: Our team creates a detailed plan for your approval.
Transform: Our skilled crew gets to work, bringing the design to life efficiently.
Enjoy: We hand over your beautiful new space, ready for you to enjoy for years.
Frequently Asked Questions About Turf Installation
Here are straight-up answers to the questions we hear most from homeowners in Prescott.
How long does a turf installation take?
For a typical residential lawn in the Prescott area (around 500-1,000 sq. ft.), our professional team at R.E. and Sons Landscaping can complete the entire installation in just 2 to 3 days. This includes full excavation, base preparation, turf laying, and infill.
Is artificial turf safe for pets and children?
Yes, absolutely. Modern artificial turf materials are non-toxic and safe for the whole family. For homes with pets, we always recommend a specialized pet-friendly infill. This type of infill has anti-microbial properties that prevent odors and keep the play area clean and safe for both kids and animals.
How does artificial turf drain during monsoon season?
Properly installed artificial turf drains exceptionally well, even during our heavy monsoon seasons. We engineer the foundation with two key features: a permeable sub-base made of materials like decomposed granite that allows water to pass through, and a slight 1-2% grade that channels water away from your home. This two-part system is the secret to preventing puddles.
How much does professional turf installation cost in Prescott?
The cost varies based on the size of the area, the type of turf selected, and the amount of site preparation required. However, it's a long-term investment that eliminates costs for watering, mowing, and fertilizing. At R.E. and Sons Landscaping, we provide free, no-obligation consultations to give you a precise quote for your specific project.
Can you install artificial turf over existing concrete?
Yes, you can install turf over concrete, but the process is different. It requires a drainage layer or shock pad underneath to prevent water from pooling and to provide a softer surface. The turf is then secured around the perimeter with a specialized adhesive. It's an excellent way to transform a patio or balcony.
Ready to transform your yard into a beautiful, low-maintenance space that’s built to handle the Northern Arizona climate? Contact R.E. and Sons Landscaping today for a complimentary design consultation. Let’s bring your vision to life.
Published via the Outrank app


Comments