
Outdoor Kitchen Counter Height: Standard Sizes Explained
A standing prep counter is usually 36 inches above the finished patio, a bar counter is 42 to 46 inches, and a table-height dining surface is about 30 inches. The right outdoor kitchen counter height depends on who'll use each zone, what appliances go there, and how the finished patio is built.
Could one counter height really suit every cook, every task, and every seat? For homeowners in Prescott, Prescott Valley, Chino Valley, and nearby Northern Arizona communities, R.E. and Sons Landscaping plans outdoor kitchens around those differences. Measuring from the completed patio surface, then coordinating work areas with appliances and access, helps prevent a comfortable-looking plan from becoming awkward to use.
Standard Outdoor Kitchen Counter Heights and Why 36 Inches Is the Default
R.E. and Sons Landscaping starts most outdoor kitchens at 36 inches for standing prep, 42 to 46 inches for bar tops, and about 30 inches for table-height dining. Measure each height from the finished patio or deck surface to the top of the countertop, not from soil or an unfinished slab. The table treats each height as a working option for a particular job, not a rule for every surface.
Surface | Typical Height | Range | Best For |
|---|---|---|---|
Standing prep counter | 36 inches | 36 to 38 inches | Chopping, plating, and grill access |
Accessible work surface | 34 inches | 28 to 34 inches | Seated or wheelchair use |
Dining or table-height surface | 30 inches | 28 to 34 inches | Eating and casual serving |
Bar counter | 42 inches | 42 to 46 inches | Standing guests and bar seating |
Adjustable segment | 29 to 36 inches | 29 to 36 inches | Mixed-height households |
The 36-inch prep height is a conventional residential starting point. A surface may rise to about 38 inches when appliance dimensions, refrigerator integration, or a taller user call for it. For accessible work or dining, the U.S. Access Board's guidance for dining and work surfaces gives a 28-to-34-inch range. Related accessible kitchen-work guidance commonly uses a 34-inch maximum. These are useful planning benchmarks, but they don't automatically make every private home subject to ADA obligations.
The difference between a 36-inch worktop and a lower surface changes how someone reaches, approaches the counter, and uses the space below it. A 34-inch section sits 2 inches below a conventional 36-inch counter, while a 30-inch section sits 6 inches below it. Those distinctions can matter to someone preparing food while seated, or to a household where users have different reach and mobility needs.
Why 36 inches became familiar
The familiar height has a history in indoor kitchens, not a rule written specifically for patios. Historical accounts of kitchen counter heights describe early-1930s countertops at about 31 inches, while freestanding sink tops were approximately 36 inches. As continuous countertop runs became common, sink height helped set the height for the full work surface. Early time-and-motion research associated with workplace efficiency and ergonomics, including work by Christine Frederick and Lillian Gilbreth, also shaped thinking about kitchen tasks.
That history makes 36 inches a practical baseline for standing preparation, chopping, serving, and reaching a built-in grill. It doesn't make the same height right for a dining table or bar. For another perspective on coordinating counter choices with the wider layout, see planning with Home Pro's Remodeling & Repairs.
Ask who'll stand at the counter most often, and for how long. R.E. and Sons Landscaping uses 36 inches as a starting point, then adjusts the design to the people, appliances, and uses involved.
How to Measure the Right Counter Height for Your Body
A comfortable outdoor kitchen counter height starts with the finished walking surface and the person doing the work. A tape measure, a sturdy table or stacked boxes, and a real cooking test can help you settle on a useful height before construction.
Fix the finished surface first. Record how high the pavers, mortar bed, and leveling base will sit above the soil or slab. Measuring from unfinished ground can leave the completed counter higher or lower than you intended.
Stand in your normal cooking posture. Wear the shoes you're likely to cook in, relax your arms, and stand as you would while preparing food. Measuring in an unnatural pose can make the counter feel wrong once you start working.
Measure to the bend of your elbow. Use the floor-to-elbow measurement as a body reference, rather than assuming everyone is comfortable at the same standard height. Keep your shoulders relaxed while someone else takes the measurement.
Adjust for the task. As a working rule, subtract about 2 inches for light work, such as plating, and about 4 inches for heavier chopping or kneading. These offsets help you test options, but they aren't code requirements.
Include the countertop thickness. Add the stone or other countertop cap to the cabinet or base calculation. Forgetting that thickness can raise the final work surface by an inch or more, turning a sound cabinet plan into a counter that's too tall.
Test the proposed height. Set a sturdy table or stacked boxes to the planned finished height, then prepare a real meal with the people who'll use the kitchen. A short test can reveal awkward reaching or a tiring posture before the counter is permanent.
Lock the number before building. Confirm the final surface elevation before masonry or cabinetry begins. Changing the plan after the base is built can affect appliance openings and the relationship between adjacent work zones.
The subtraction amounts are rules of thumb, not code. Confirm the height at the mock-up stage with the people who'll use the counter.
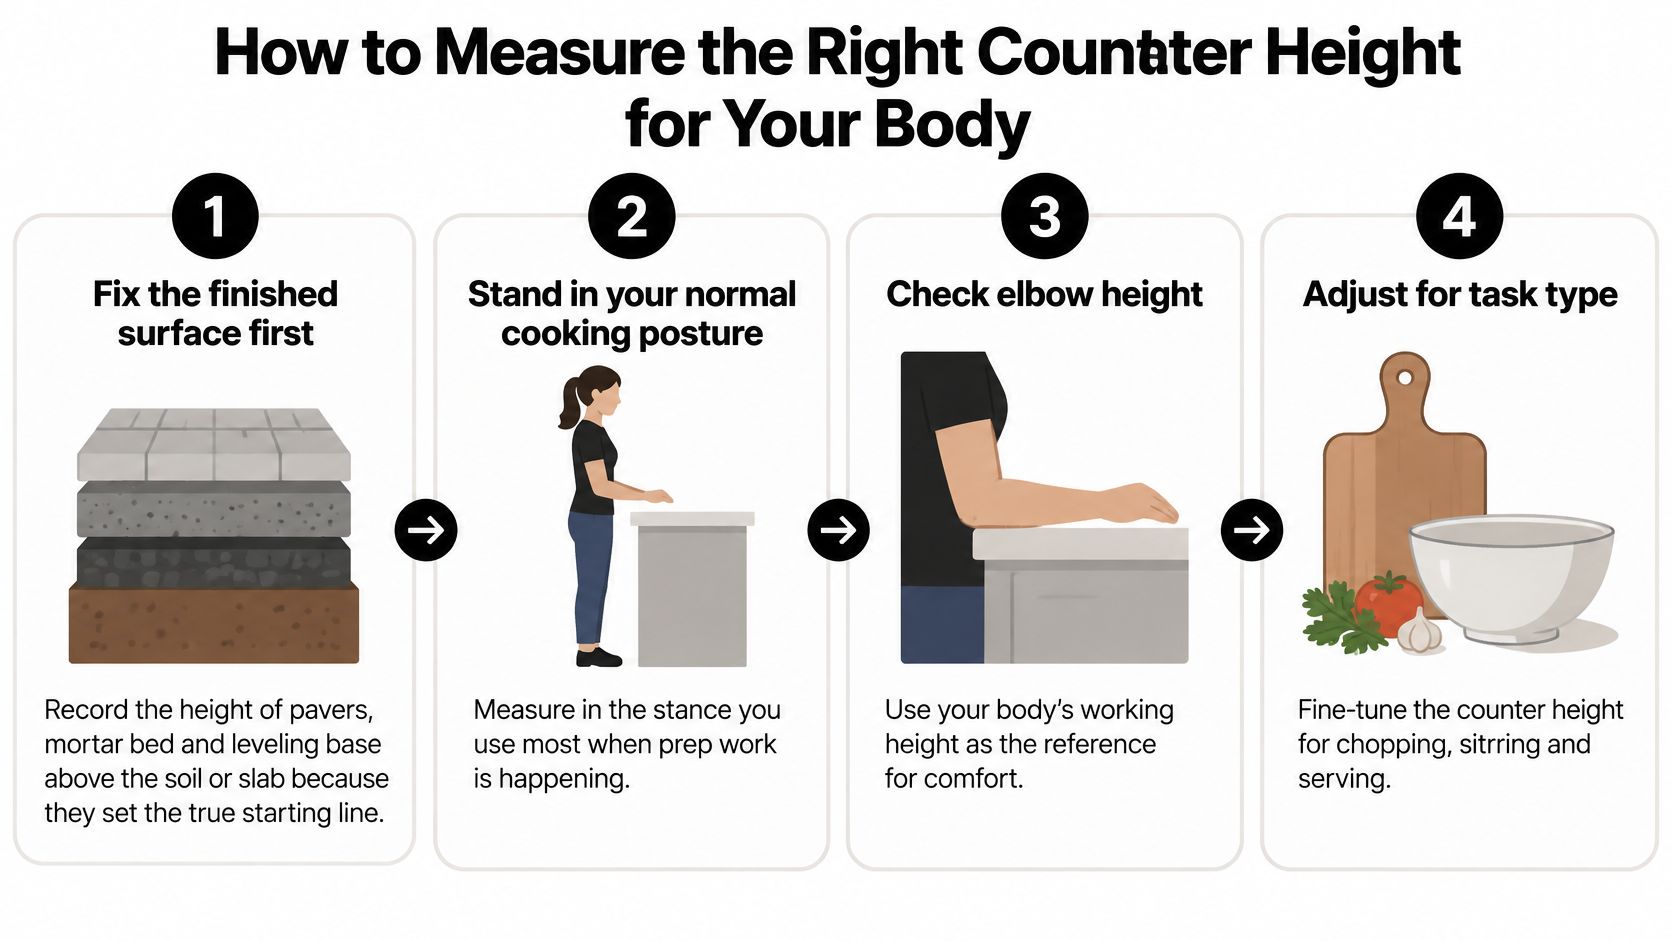
Use a simple counter mock-up to check your posture and reach before committing to the final build.
Accessible and Seated Work Heights Under ADA Guidance
What makes a lowered counter usable rather than merely lower? The answer sits under the top. A seated work station works like a small alcove: the counter is the roof, and the open space below is what lets a chair, knees, and feet arrive at the work. If masonry, a cabinet back, or a gas line fills that alcove, the counter height becomes decoration.
For a dedicated outdoor work surface intended for seated use, a common planning target is around 34 inches or slightly lower, with a clear section at least 30 inches wide. The U.S. Access Board's accessibility guidance describes the clearances that make such a surface usable: knee clearance extending up to 27 inches high, toe clearance beginning at the floor and reaching at least 17 inches deep, and a forward approach area of 30 by 48 inches. ADA requirements mainly address covered public settings, and a private backyard may not be covered in every jurisdiction, but these dimensions offer a practical accessibility benchmark.
Element | Typical planning target | Common outdoor conflict |
|---|---|---|
Work surface height | No higher than 34 inches | Thick stone cap raising the finished top |
Clear counter width | At least 30 inches | Appliance cutout consuming the run |
Knee clearance | Up to 27 inches high | Masonry legs or cabinet backs |
Toe clearance | Starts at the floor, at least 17 inches deep | Plumbing or gas lines beneath the counter |
Forward approach area | 30 by 48 inches | Trash pull-outs or grill doors |
A lowered top alone doesn't create an accessible station. The space underneath has to work too. A masonry leg or cabinet back may block knees; insulation, an appliance enclosure, or gas and plumbing lines can occupy toe space. An appliance cutout can also take away the clear width needed for the work surface. Those conflicts are easy to miss on a plan because they sit below the line you are used to drawing.
Draw the accessible station as a complete section detail, including what sits below and in front of it. Keep the approach clear of grill doors and trash pull-outs. For examples of how accessibility affects the overall arrangement, review these kitchen layouts with wheelchair access.
For a Prescott patio, a 34-inch lowered station beside a 36-inch grill run can give seated and standing cooks distinct places to work. Before fixing the layout, check that the lowered section has usable knee and toe room and that the transition between heights doesn't interrupt the path or work surface. In a mixed-height household, that separation matters more than a single compromise number: one cook can stand at the grill while another works seated at the lowered counter, and each zone keeps its own finished elevation and clearance. Prescott's afternoon sun can make an unshaded counter uncomfortable, so note shade placement in the same drawing as the clearances.
Bar Counter Height and Stool Pairing
A bar counter is a social surface, so its height has to solve two problems at once: the top must sit at a comfortable lean-and-rest level for standing guests, and the seat below must put their feet on the floor without forcing knees into the cabinet. The table below uses the usual 42-to-46-inch bar range. The stool height follows the finished top, not the drawing.
Counter Height | Stool Seat Height | Overhang Depth |
|---|---|---|
36 inches | 24 to 26 inches | At least 12 inches |
42 inches | 28 to 30 inches | At least 12 inches |
46 inches | 30 to 32 inches | At least 12 inches |
Measure after the countertop is set, including any edge build-up. A 42-inch bar with a 28- to 30-inch seat gives most adults a comfortable perch. A 46-inch top needs a taller seat and often a footrest so shorter guests are not left dangling. In a household with mixed heights, pick the middle of the stool range and test with the actual stools.
Give knees enough room
Overhang depth matters as much as height. At least 12 inches of clear overhang gives knees somewhere to go and keeps spills off the cabinet face. The supporting structure must carry that cantilever, and the seating edge should be drawn into the build rather than added after the counter is framed. Keep the underside free of braces, outlets, and cabinet doors that would hit a guest's knees.
Where the bar meets the prep run, make the step from the 36-inch work surface deliberate. A clear rise separates guest seating from the cook's zone and prevents a half-height ledge that fits neither job. For more on clearances and seat spacing, this guide to outdoor kitchen bar dimensions covers the layout side of the decision.
In Prescott, afternoon sun can make an exposed bar unusable even at the right height. Place seating under a pergola or shade structure, and leave enough space between stools and the grill so guests can talk with the cook without blocking the work zone. If you are planning several hosted weekends, strategies for rising ingredient costs can help with the food budget while the bar layout stays fixed.
Test the counter and seat heights together at the mock-up stage. Bring the stools you intend to buy, sit at the bar, and check knee room, foot support, and the distance to the grill. A height that looks right on paper can still fail once a guest sits down.
Mixing Heights for Different Users and Appliances
Lowering every counter can make seated access easier but may make standing preparation less comfortable. Raising the whole run can suit a taller cook while making the work surface harder to reach for shorter users. A zone-based layout gives each task its own height instead of forcing the household to compromise everywhere.
Think of an outdoor kitchen like a restaurant line: different stations support different jobs, and the handoffs between them matter. A standing cook might use a prep area around 36 inches, while a lower section around 30 to 34 inches can support seated work or a child helping with preparation. A 42-to-46-inch bar serves guests rather than replacing either work surface.
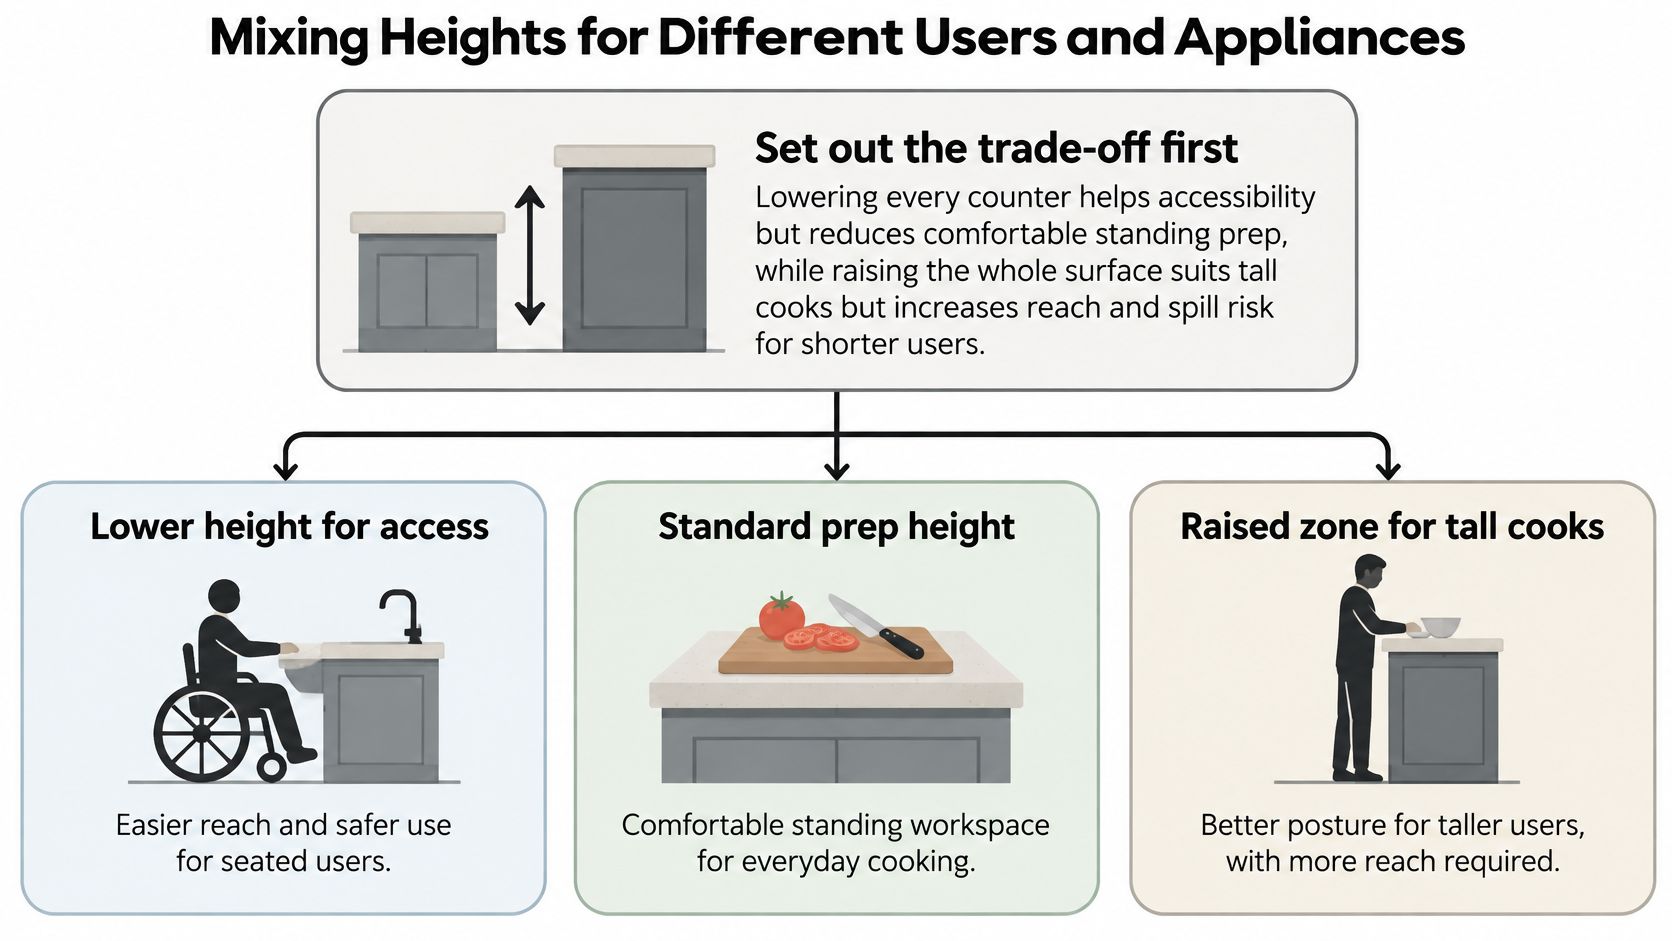
Coordinate heights with appliances
A counter may feel right in a body-measurement test but still put an appliance at an awkward position. Sink rims and faucet controls, refrigerator drawers, pizza-oven loading surfaces, and built-in grill cutouts each have their own dimensions and installation needs. Check the specific manufacturer's requirements before fixing the counter height or building the opening.
Plan access to service panels and shutoffs, too. They need to remain reachable for repairs and winterization rather than being sealed behind masonry or blocked by a neighboring appliance. R.E. and Sons Landscaping can incorporate built-in grills, sinks, refrigerators, pizza ovens, and other features into a custom layout; its outdoor kitchen appliance guide can help homeowners consider how equipment fits into the plan.
Plan for the Prescott-area setting
Finished elevations, drainage, and exposure all affect how the kitchen works outside. Confirm the countertop thickness before setting the base height, and plan the surface so water drains away from cabinets and appliance openings. In Prescott-area conditions, intense sun and seasonal temperature swings make it sensible to consider shade and to place heat-sensitive appliances away from direct exposure.
Mock up each planned zone, then cook a full meal with the people who'll use it. Pay attention to where ingredients move between the refrigerator, sink, prep counter, grill, and serving area. That test can reveal whether the layout connects its different heights and appliances into a workable sequence.
Pre-Build Checks, Licensing and Common Height Questions
Before construction, work through five checks:
Confirm the finished elevation. Account for the countertop thickness, pavers, and mortar bed.
Verify appliance clearance. Match each manufacturer's clearance and cutout requirements.
Keep service points reachable. Plan access to panels and shutoffs for winterization and repairs.
Plan drainage. Direct water away from cabinets and appliance openings.
Test the mock-up. Check the proposed heights with the people who'll use the kitchen.
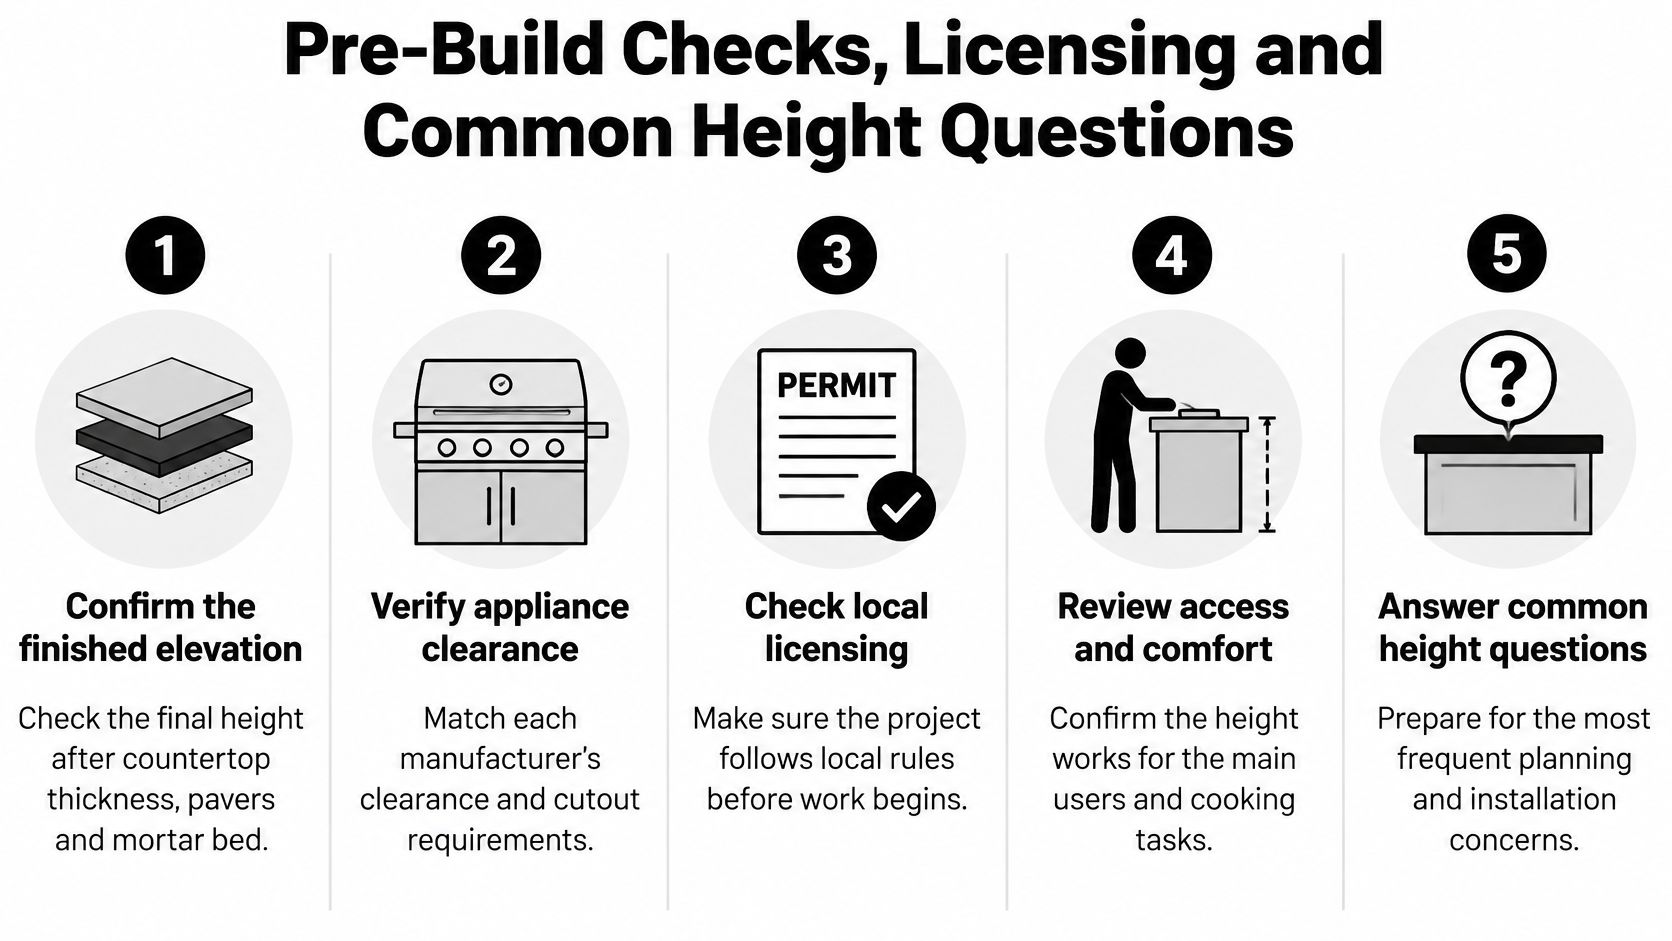
Confirm utility responsibility before building
The Arizona Registrar of Contractors' license classifications state that the specialty residential classification for free-standing, uncovered outdoor kitchens requires electrical, plumbing, and gas work to be subcontracted to properly licensed contractors. That classification doesn't authorize installation or contracting for covered outdoor kitchens, and it lists additional limits involving new electrical service panels, gas or plumbing lines, and related construction. Confirm who's responsible for each utility connection before work begins, especially if the counter layout affects the grill, sink, gas routing, or electrical service.
R.E. and Sons Landscaping is a licensed, bonded, and insured Prescott-based design-build company with Arizona ROC #300642. Permanent outdoor kitchens with gas, plumbing, or electrical connections typically require permits; the company handles permitting as part of project management. For an overview of the build process, see how to build an outdoor kitchen.
Common counter-height questions
What counter height suits a wheelchair user?
Plan a dedicated lowered section no higher than 34 inches, with at least 30 inches of clear width and usable knee and toe space beneath it. Keep the approach clear so the user can reach the work surface.
Does 36 inches fit everyone?
No. It's a starting point, not a universal fit, so use the body-measurement steps and test the proposed height before settling on the finished elevation.
Can an existing patio take an outdoor kitchen?
Often, yes, once the existing slab, gas access, and layout have been assessed on site. R.E. and Sons Landscaping serves Prescott, Prescott Valley, Chino Valley, and Northern Arizona, and can schedule a site visit to evaluate those conditions.
R.E. and Sons Landscaping offers outdoor-kitchen design and construction, including countertops and layouts coordinated with the people, appliances, and finished patio. Contact R.E. and Sons Landscaping to book a free consultation and site visit before masonry starts.
Comments