
Paver Patio How to: Build a Durable Outdoor Space
You're standing in a blank backyard, looking past the grass and picturing a place for dinner, a fire pit, or a few comfortable chairs. The finished patio looks simple. The work underneath it isn't. A paver patio succeeds or fails according to what happens below the visible surface, especially the soil density, base compaction, drainage slope, and perimeter restraint.
R.E. and Sons Landscaping helps homeowners in Prescott, Prescott Valley, Chino Valley, and surrounding Northern Arizona communities plan and build paver patios that suit the site, the climate, and the way the family will use the space. Northern Arizona brings intense monsoon runoff, freeze-thaw movement, rocky or expansive soils, and sharp changes in moisture. A design that ignores those conditions can settle, heave, or hold water within a few seasons.
Planning Your Paver Patio Before You Break Ground
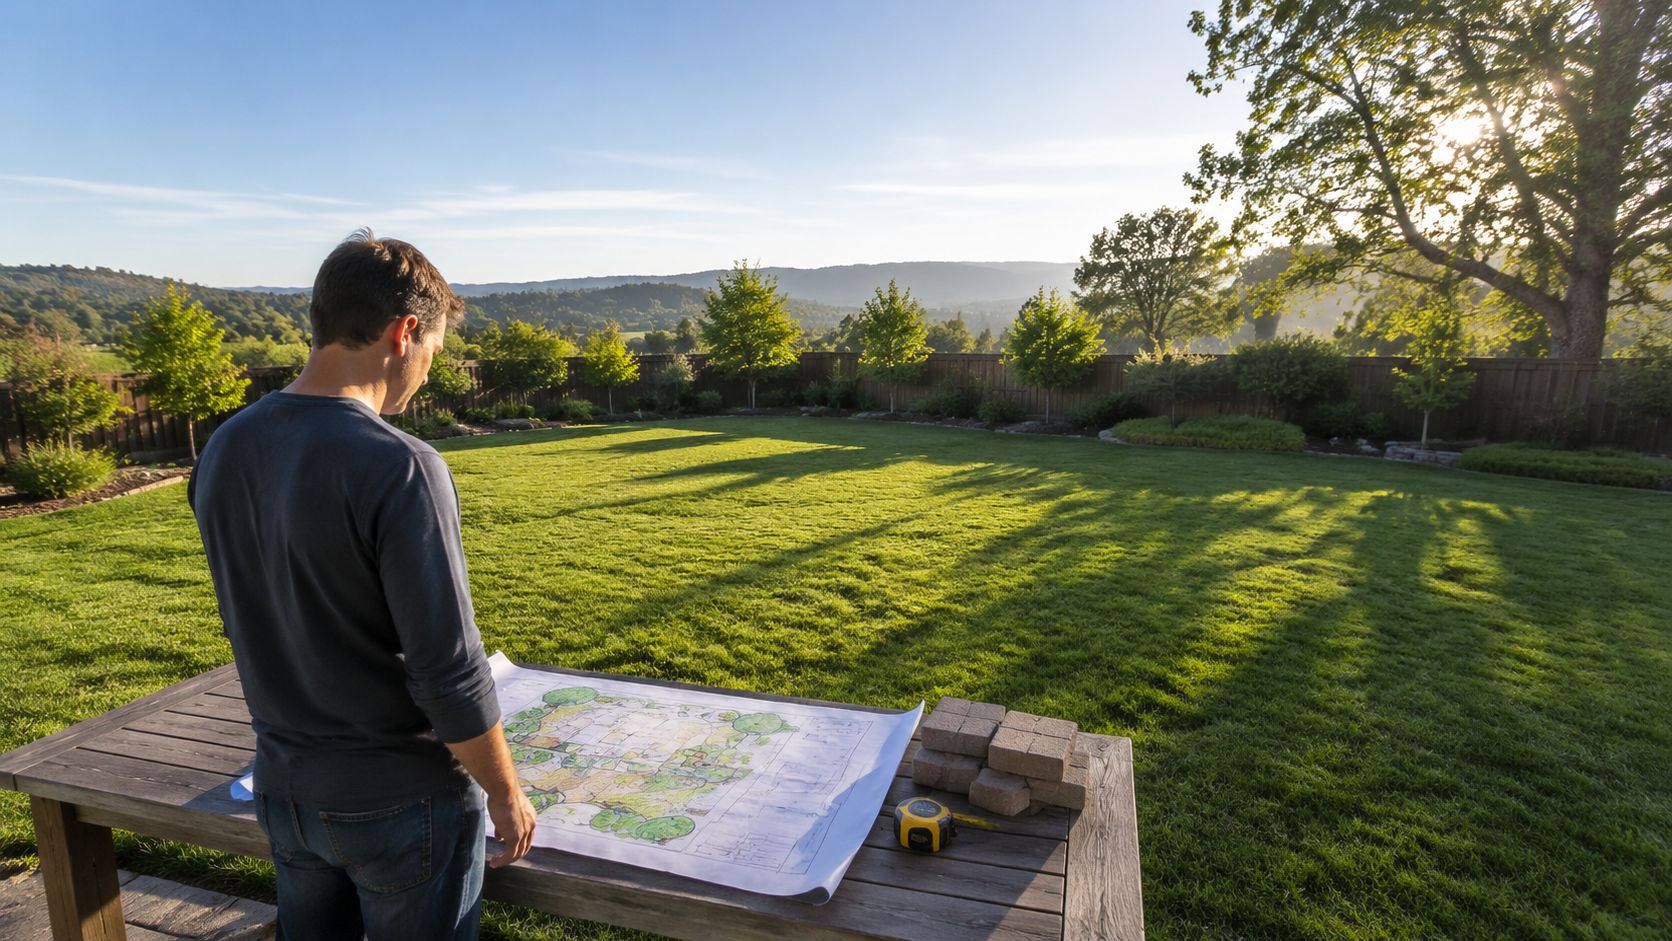
A rectangle sketched behind the house can become a difficult job once the stakes go in. Doors, roof runoff, existing grades, utility lines, trees, irrigation, steps, and natural drainage all affect the layout. A paver patio is a compacted aggregate structure with a finished surface on top, so the visible pattern is only one part of the work.
R.E. and Sons Landscaping approaches each site according to its soil, climate, access, and intended use. The first decision is whether the project has straightforward grades and easy access, or requires excavation near a foundation, retaining walls, complex drainage, large-format units, or a permeable system. A capable DIYer may handle a simple layout. Difficult grades and uncertain soil justify a professional assessment before ordering materials.
What should you decide first
Start with how the patio will function. Dining furniture, a grill, fire features, walking routes, and the connection to the house establish the footprint. Curves and intricate patterns can work well, but they require more cuts and tighter control than a rectangular field. Review local paver patio design ideas and compare them with the actual access, furniture, and maintenance needs of the site.
Inspect the ground after rain. Note ponding, erosion channels, downspout discharge, soft areas, and places where water already crosses the proposed patio. Monsoon runoff can reveal a poor drainage plan quickly in Northern Arizona. Freeze-thaw movement then widens the consequences when moisture remains beside weak or poorly compacted soil.
Plan for the base before selecting the surface. Remove unsuitable soil, confirm where excavated material will go, and allow enough working room for compaction equipment. The base must be placed in controlled lifts and compacted thoroughly. A finished patio can look perfectly aligned on installation day while settling later if the subgrade was left loose or damp.
The system has a long record of use. Modern concrete pavers were developed in the Netherlands in the late 1940s and reached North America in the mid-1970s. Their concept also traces back to Roman roads built from fitted stone units over compacted aggregate. The Concrete Masonry and Hardscape Association's technical history explains why layered construction remains central to interlocking pavement.
For furniture, shade, circulation, and layout ideas, compare this guide to outdoor living space design.
Jobsite rule: Paver color cannot compensate for weak soil, shallow compaction, or drainage that directs water toward the house.
Site Layout and Drainage Slope Strategy
A patio can look level and still fail if its grade sends water toward the house. Plan a 1 to 2 percent slope away from structures, following paver patio installation guidance. The fall is subtle underfoot, yet it gives rainwater a route away from the foundation rather than leaving moisture beneath the pavement.
How do you establish the patio grade
Start at the highest-risk boundary, usually the house wall, door threshold, or foundation. Mark the proposed corners with stakes and run string lines around the perimeter. Use a line level or laser level to set the finished elevation at the house, then carry that reference toward the yard.
A one percent grade drops one inch for every eight feet, or one-eighth inch per foot, as shown in the required drainage visualization. Measure the patio length and calculate the total fall before excavation. Adjusting the grade after pavers are installed usually means rebuilding the surface.
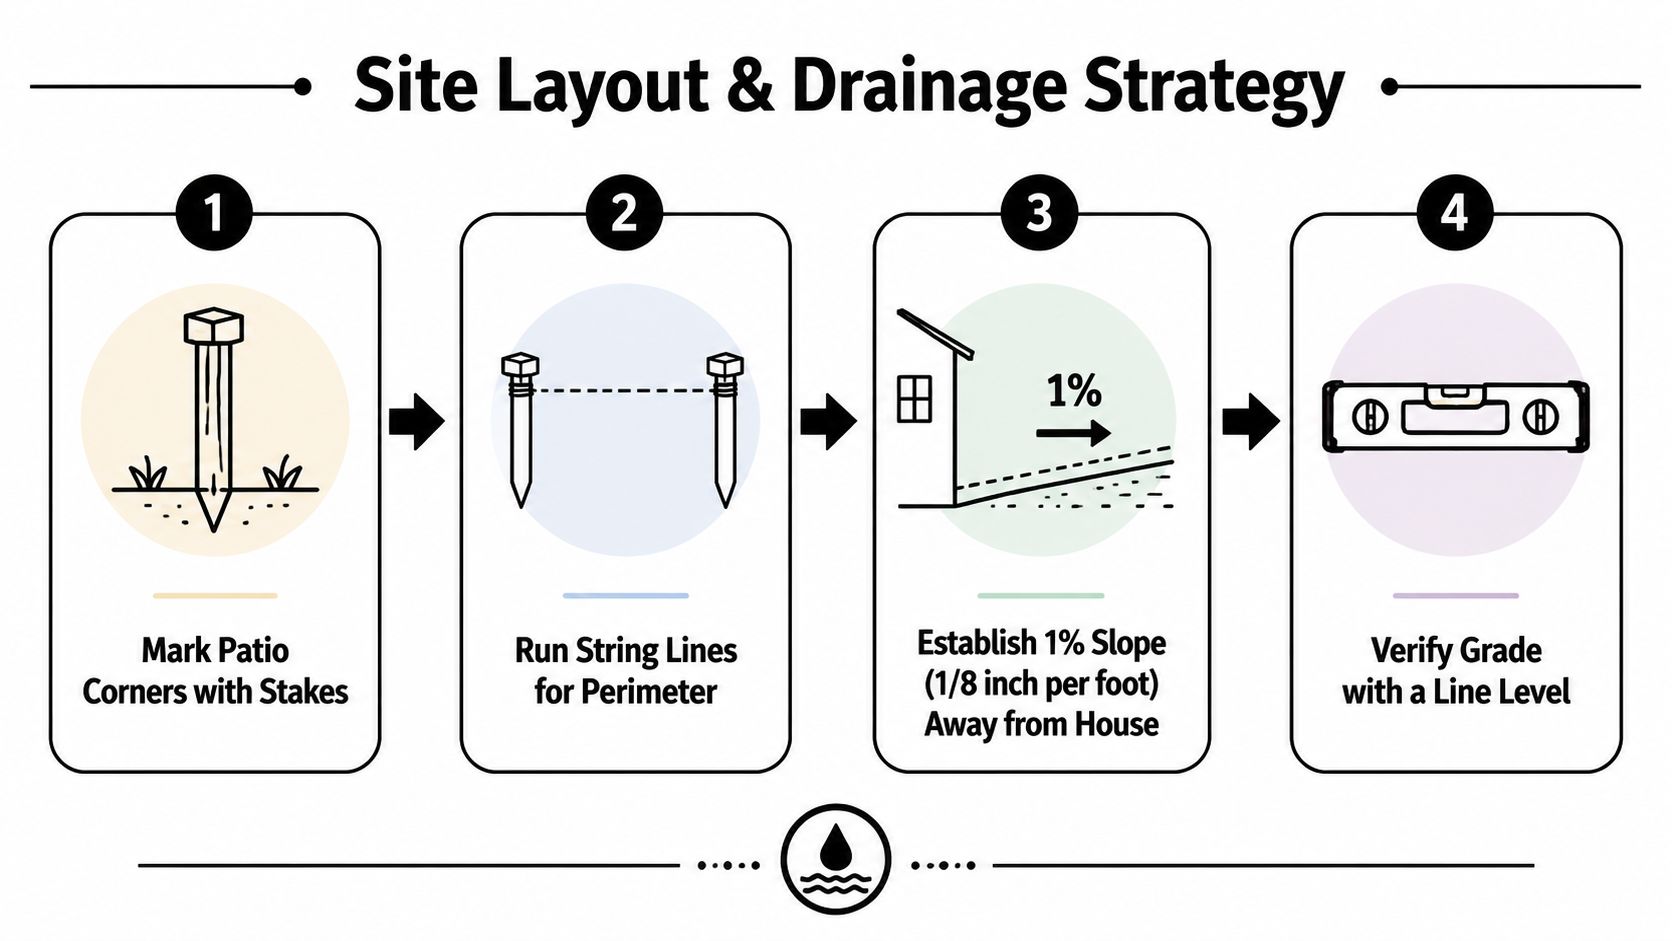
Runoff also needs a safe destination. A planting area, approved drainage route, or suitable infiltration zone may work. Water should not discharge toward a neighboring property, basement stairwell, or low lawn area. In Prescott and Prescott Valley, check roof downspouts and existing yard grades before fixing the patio footprint. This local grading and drainage resource provides another way to review runoff conditions before soil is removed.
What happens before digging
Arrange utility marking before excavation. Confirm gas, electric, water, communications, irrigation, and private lines that public marking services may not identify. A shovel or mini excavator can damage an unmarked service before the patio work has begun.
After the corners and drainage route are set, calculate excavation depth from the proposed finished surface downward. Include the paver thickness, approximately one inch of bedding sand, and the compacted aggregate base. Residential patios commonly need 4 to 6 inches over well-drained soils, while driveways generally require 8 to 12 inches because vehicles impose greater structural demand, according to this contractor paver installation guide.
Do not excavate the entire area to a uniform depth without checking elevations. The excavation bottom must follow the planned grade, or leave enough room to build the compacted base to that grade accurately. In Northern Arizona, this control matters because monsoon runoff and freeze-thaw moisture expose small drainage errors quickly. Water held beside a weak edge can contribute to settlement or heaving within a few seasons.
Excavation and Base Compaction That Prevents Settlement
A patio can look perfectly finished and still be failing underneath. In Northern Arizona, weak subgrade, uneven compaction, and trapped moisture often show up after freeze-thaw cycles as settled joints, cracked edges, or pavers that heave out of plane. The aggregate base and compacted soil below the pavers carry the load and control how the surface responds to movement.
Excavate to the combined depth of the paver, roughly one inch of bedding sand, and the specified base. Remove organic soil, roots, loose fill, and soft pockets. A clean-looking excavation can still contain isolated weak zones, so compact and check the native subgrade before placing aggregate.
Why density matters
Visual firmness is not a reliable test. Technical guidance uses measurable density as the performance benchmark. For pedestrian and residential driveway pavements, CMHA guidance specifies at least 98 percent of Standard Proctor density for compacted soil subgrade. The installation sequence also calls for native soil compaction to at least 95 percent Standard Proctor density under ASTM D698, while heavier-duty work uses 98 percent Modified Proctor density under ASTM D1557. These requirements are covered in independent interlocking pavement guidance.
Those figures indicate whether the soil can resist later movement. A plate compactor may make the surface feel hard while deeper material remains loose. During freeze-thaw cycles, moisture enters those weak areas, freezes and expands, then leaves unsupported pockets as the ground shifts.
How should aggregate be installed
Place clean, angular aggregate in controlled lifts. Keep each lift no thicker than 4 inches, then compact it before adding the next layer. The compactor must reach the full depth of each lift. Dumping the full base at once and compacting only the top can leave a firm crust over loose stone.
Use this sequence at the jobsite:
Excavate and clean: Remove unsuitable material and shape the subgrade to the planned drainage grade.
Separate materials where needed: Geotextile fabric may limit soil and aggregate migration when site conditions warrant it.
Build the base in lifts: Place crushed aggregate in controlled layers, not one deep dump.
Compact every lift: Use a plate compactor and make enough passes to produce uniform density.
Screed the bedding layer: Add sand only after the base is stable, clean, and correctly graded.
Required base thickness depends on soil, drainage, use, and local conditions. Installation guidance describes compacting aggregate in 3 to 4 inch lifts, while other criteria specify compacted aggregate layers reaching at least 95 percent Proctor density. This installation reference shows why lift thickness and density matter more than just adding extra loose stone.
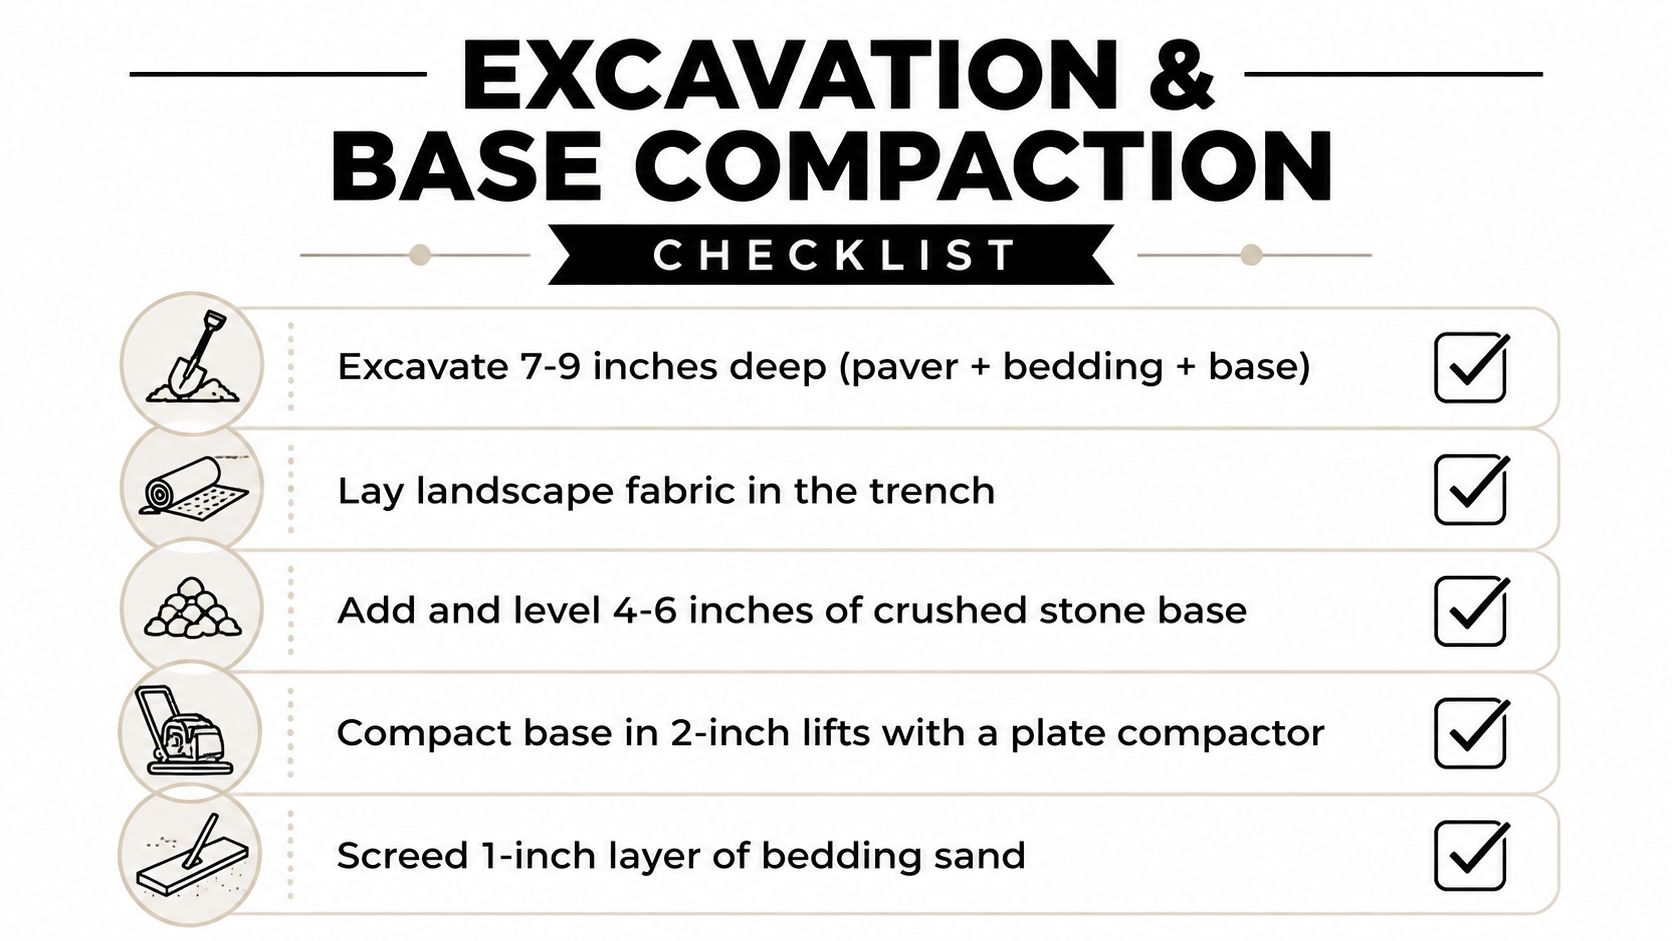
Inspect for birdbaths, soft spots, contaminated aggregate, and places where the base has drifted from the planned slope. Correct each condition before screeding sand. Surface adjustments cannot repair a weak foundation.
Laying Pavers and Locking the Surface
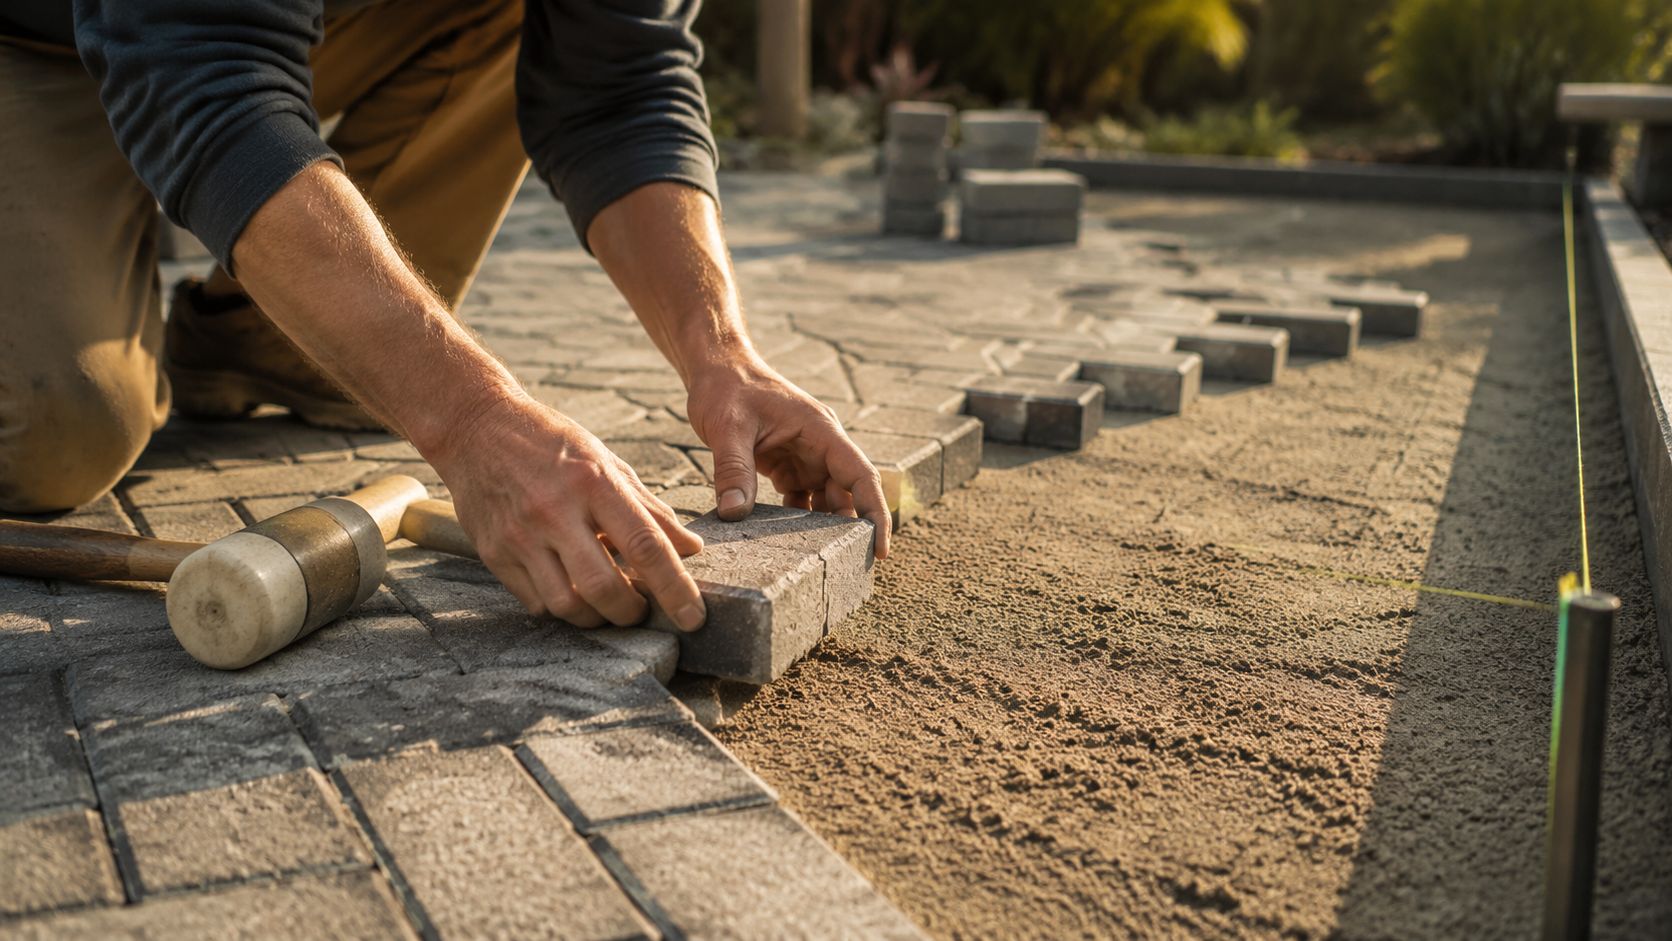
A patio can look finished and still fail if the pavers are installed over uneven bedding or an unstable edge. Once the base has the planned elevation, density, and drainage slope, screed the bedding sand to approximately one inch. Use rails and a straight screed board to produce an even setting layer. Keep off finished sand, and do not use it to fill deep depressions in the aggregate. Repair the base before placing sand.
Begin at a stable reference edge, often the house-side line or a securely installed border. Set the pattern square to the intended sightline rather than assuming the nearest fence is straight. Running bond, herringbone, and modular patterns all work, but they differ in cutting demands, waste, and visual rhythm.
How tight should paver joints be
Maintain paver joint gaps at 2 to 4 millimeters. This range gives installers enough tolerance for placement and minor movement while allowing jointing material to lock the units together. Wide gaps use more joint sand and reduce interlock. Forcing units tightly together can chip their edges during installation and leaves little room for small movement, a concern on freeze-thaw sites in Northern Arizona.
Use a rubber mallet for local adjustments. Cut borders with a masonry saw or suitable wet-cutting tool. Dry-cut diamond blades create dust, so use the required respiratory and eye protection and follow the tool manufacturer's instructions. Mark curves carefully. Small wedge cuts suit gentle arcs, while complex shapes usually require a saw and a template.
Why edge restraint belongs on the base
Install edge restraints before filling the field along the perimeter, and anchor them to the compacted base, not the bedding sand. A restraint placed on sand can move with the border pavers. As the field spreads, joint sand escapes and the perimeter loosens. That movement becomes more noticeable after seasonal moisture and freezing conditions.
Drainage details also affect joint performance because water must leave the surface without carrying joint sand away. This CMHA resource on edge restraint and joint containment explains how perimeter stability and water management work together.
After placing the pavers and cuts, make the final plate-compactor passes required for the product. Sweep compatible joint sand across the surface, compact again, and refill the joints until they stay filled. Protect paver edges during compaction, especially with textured or large-format surfaces, and use equipment suited to the manufacturer's installation requirements.
DIY Installation Versus Hiring a Professional Installer
A paver patio can suit a capable DIY installer when the footprint is modest, access is good, and the grade is straightforward. The visible work is manageable. The difficult work happens below the surface: excavating to consistent depth, building the aggregate base in controlled lifts, compacting each lift, and preserving the planned drainage slope. In Northern Arizona, a weak subgrade can settle during wet weather, while trapped moisture can contribute to heaving during freeze-thaw cycles.
For scheduling, consumer installation guidance uses a 300-square-foot patio completed by professionals as a benchmark of approximately 35 to 40 hours. That time includes site preparation and installation, not just setting pavers. A homeowner also needs to plan for material handling, equipment rental, disposal, saw setup, weather interruptions, and the time required to correct mistakes.
Installed paver patios commonly range from about $8 to $25 per square foot, with high-end materials reaching roughly $50 per square foot. Professional labor is often priced around $4 to $11 per square foot, according to the same cost guide. These figures provide market guidance rather than a site-specific quote. Access, excavation, soil conditions, drainage work, pattern, and material selection can change the total.
Factor | DIY Approach | Professional Installation |
|---|---|---|
Site evaluation | Homeowner measures grades and identifies weak areas | Crew assesses soil, drainage, access, and structural requirements |
Excavation | Hand tools or rented equipment, with disposal arranged separately | Coordinated excavation, hauling, and grade control |
Compaction | Plate compactor rental and personal judgment | Commercial equipment and established compaction procedures |
Layout | More time for learning, measuring, and cutting | Experienced pattern control around doors, curves, and obstacles |
Risk | Material savings can disappear if the base must be rebuilt | Higher upfront labor cost, with the preparation handled by the crew |
Complexity | Best suited to uncomplicated, accessible sites | Better fit for grading challenges, large-format units, and permeable systems |
Which projects should a homeowner avoid
Large-format pavers demand tighter base tolerances and careful handling. Uneven support can leave units rocking or expose them to cracking. Permeable systems require a drainage-focused assembly, so a standard patio base is not an appropriate substitute. Professional review makes sense near foundations, steep grades, retaining walls, or sensitive utilities, where a small elevation error can redirect runoff or destabilize the edge.
R.E. and Sons Landscaping provides design-build landscaping, paver patios, grading-related work, and ongoing maintenance for homeowners across Prescott, Prescott Valley, Chino Valley, and Northern Arizona. Whether you hire that company or another qualified contractor, ask how the crew will verify subgrade and base preparation, manage runoff, install edge restraints, and document the proposed finish elevations.
Common Installation Mistakes and How to Avoid Them
A patio can look correct on installation day and still fail after a few seasons. The weak points are usually hidden below the pavers: loose subgrade, uneven base compaction, or a drainage slope that sends monsoon runoff toward the house. Freeze-thaw movement in Northern Arizona exposes those shortcuts through settlement, cracked joints, and heaving edges.
A flat patio is not a safer patio
A surface that appears flat can hold water. Set the finished field with a planned 1 to 2 percent fall away from structures, then direct runoff toward a suitable receiving area. Slope toward a wall and water can collect at the foundation, saturate the edge, and contribute to movement in the base.
Set final elevations with stakes, strings, and a level before excavation begins. Do not wait until the bedding sand is installed to decide where water should go. Small grade errors are difficult to correct after the pavers are laid.
One deep base lift won't compact evenly
Placing all the aggregate at once and compacting only the top creates a firm surface over loose material. The deeper stone can settle later as foot traffic, furniture, and moisture movement work through the assembly. Depressions then pull nearby pavers out of alignment.
Install the base in lifts no thicker than 4 inches, compacting each layer before adding the next. Check the subgrade as well as the aggregate. If the soil pumps, flexes, or leaves deep plate marks, it needs correction before the base goes in. Compaction must be verified by consistent process and firm support, not by appearance alone.
Base depth must match use and soil
A pedestrian patio over well-drained soil commonly uses a compacted base of 4 to 6 inches, while driveways generally require 8 to 12 inches, as noted earlier. Heavy outdoor kitchens, masonry features, and repeated concentrated loads may require a site-specific design.
Soil conditions change the answer. Expansive, poorly drained, or disturbed ground needs more attention than stable, free-draining material. Adding loose stone without compacting it does not create structural support. Remove unsuitable material, rebuild in controlled lifts, and confirm the finished elevation as the work progresses.
Edge restraints can't float on sand
A perimeter restraint set on bedding sand can move outward. Once the edge shifts, pavers spread and joint sand escapes. Fasten the restraint into the compacted base, and coordinate drainage details so water can leave without carrying sand with it.
Large-format and permeable systems require separate planning. Oversized units need a flatter, more controlled base and careful placement. Permeable assemblies depend on the correct drainage aggregate structure, so they cannot be built as ordinary sand-set patios with a different surface material.
Paver Patio Maintenance and Frequently Asked Questions
Should you seal a paver patio
Sealing is a site and product decision, not an automatic requirement. A compatible sealer can affect color, stain resistance, and joint performance, but the surface must be clean, dry, and suitable for the product. Follow the paver manufacturer's instructions and test an inconspicuous area first.
How often should joints be re-sanded
Re-sand joints when material has washed or blown out, weeds are appearing repeatedly, or the pavers no longer have full joint support. Clean carefully, allow the surface to dry, sweep in compatible joint sand, and compact in a controlled manner. This paver patio cleaning and restoration guide covers surface cleaning, drying, joint restoration, and sealing considerations.
Can you pressure wash pavers
Yes, but uncontrolled pressure can remove joint sand, damage the surface, or drive debris deeper into the joints. Use the equipment and pressure appropriate for the paver, keep the spray controlled, and plan to restore joint sand afterward when necessary.
Do paver patios last longer than poured concrete
Neither material has a guaranteed result independent of installation quality. Pavers offer a segmental surface, so individual units can be removed and replaced when localized damage or access work occurs. Concrete provides a monolithic surface, but settlement-related cracking can require larger repair work. The base, drainage, material quality, and maintenance determine the practical outcome.
Can pavers go over existing concrete
Sometimes, but only after checking the slab's condition, elevation, drainage, door thresholds, and available build-up depth. A cracked, settled, or poorly drained slab can transfer problems to the new surface. Removal may be the better choice when the existing concrete cannot provide a stable, correctly graded foundation.
Are permits required in Prescott or Prescott Valley
Permit requirements depend on the project, property, structures, grading, drainage, and local jurisdiction. Confirm requirements with the applicable city or county before construction, especially when the work changes grades, affects drainage, or includes walls, steps, utilities, or covered structures.
R.E. and Sons Landscaping offers site consultations, design-build services, custom paver patios, and maintenance support for properties in Prescott, Prescott Valley, Chino Valley, and nearby Northern Arizona communities. Visit R.E. and Sons Landscaping to request project guidance and discuss the right installation approach for your soil, drainage, access, and outdoor-living plans.
Comments